


Yocto
The most robust way to currently use DiscoveryMat is to use the yocto voltmeter. This has the advantage of offering a largely sufficient precision, while being:
It is indeed plug and play, does not require any configuration, nor any driver to install. Just plug it in. It doesn't even have an on/off button. It starts automatically, without any screen and menu where you have to configure anything.
Shopping
Web Site
The model required is Yocto-MaxiMicroVolt-Rx. The above link may be subject to changes by the supplier Yoctopuce. If necessary, the Yoctopuce site is very simple, by navigating on it you will easily find the model Yocto-MaxiMicroVolt-Rx and accessories (enclosure case, usb cable).
What and Where to buy?
It is recommended to buy, in addition to the vomelter, a protective shell and a usb cable:
Price
As of January 2023, prices were:
Other requirements
You also need to get two electric wires, and two crocodile grips. The two electric cables are not provided. In addition, for assembly, plan to have a small Phillips screwdriver on hand.
Assembly
Easy
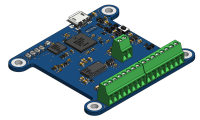
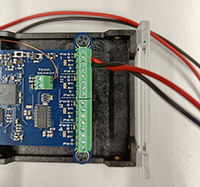
The voltmeter is in the form of a small printed circuit. It is recommended to slide it into the enclosure case to protect it. This is a small lego set with 8 screws. It is also necessary to screw two electric wires on the slot on the far right, as suggested by the images below. The small cable provides about 5cm has a temperature sensor. It connects to the middle (top view) of the printed circuit (green slot).
Step 1
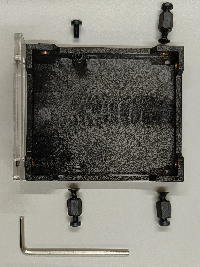
The enclosure seen from above. There are two different kinds of screw :
Step 2
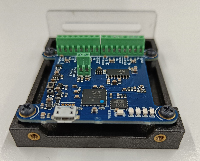
We first screw the motherboard:
Step 3
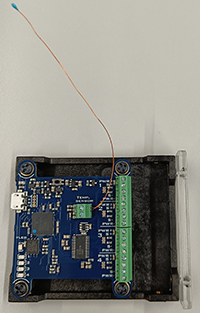
We screw next the temperature sensor on the central green connector :
Step 4
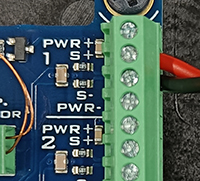
We screw next the two electric wires (red and black), not supplied. We will have previously stripped them. It is important to plug them into the slot on the far right from above :
Step 5
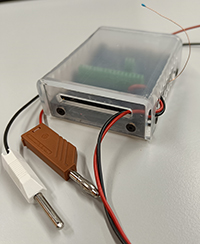
The final assembly. Note the baffle of the red and black wires in the right air vents of the enclosure to prevent stripping of the contact terminals. Crododile clips not supplied have been added :
Step 6
You are ready to use the yocto. No configuration is necessary. There is no on/off button. The yocto starts automatically once plugged into USB. This same USB connection supplies it with energy.